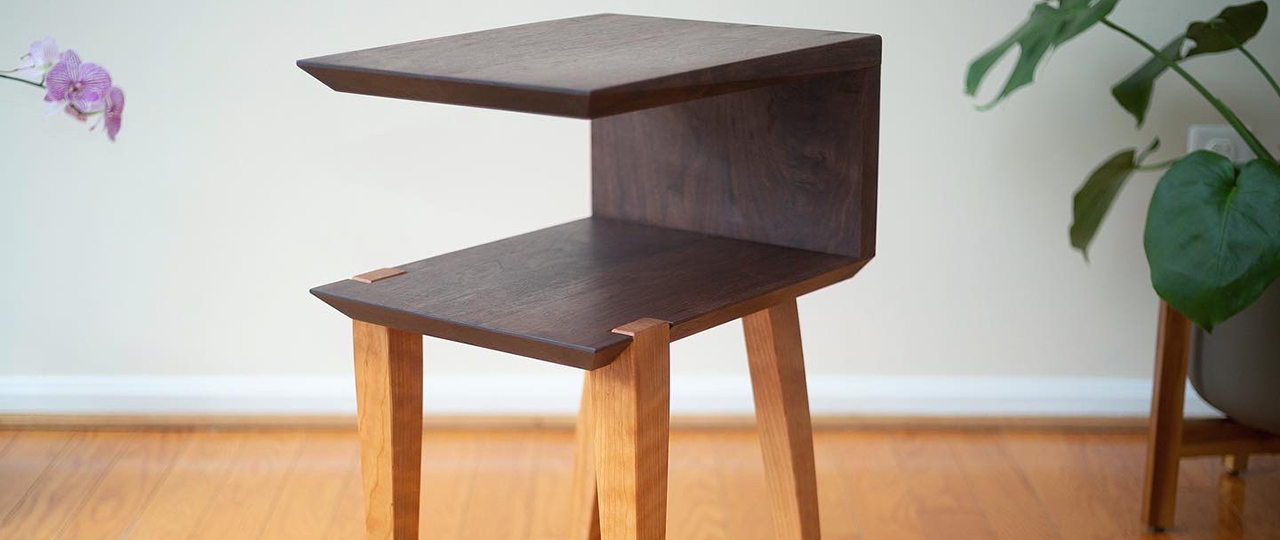
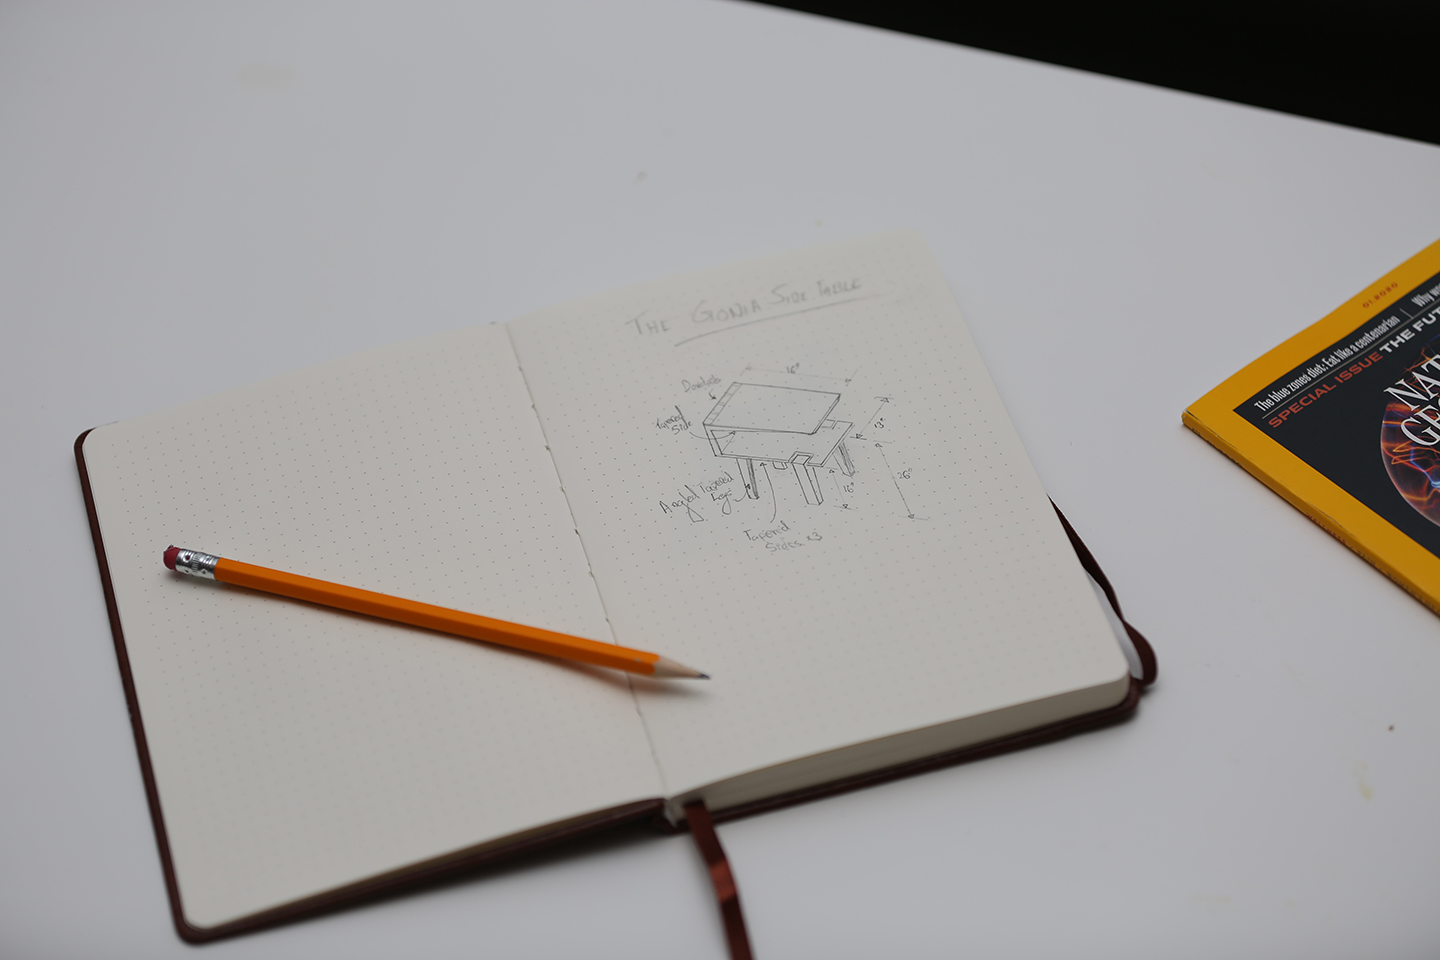
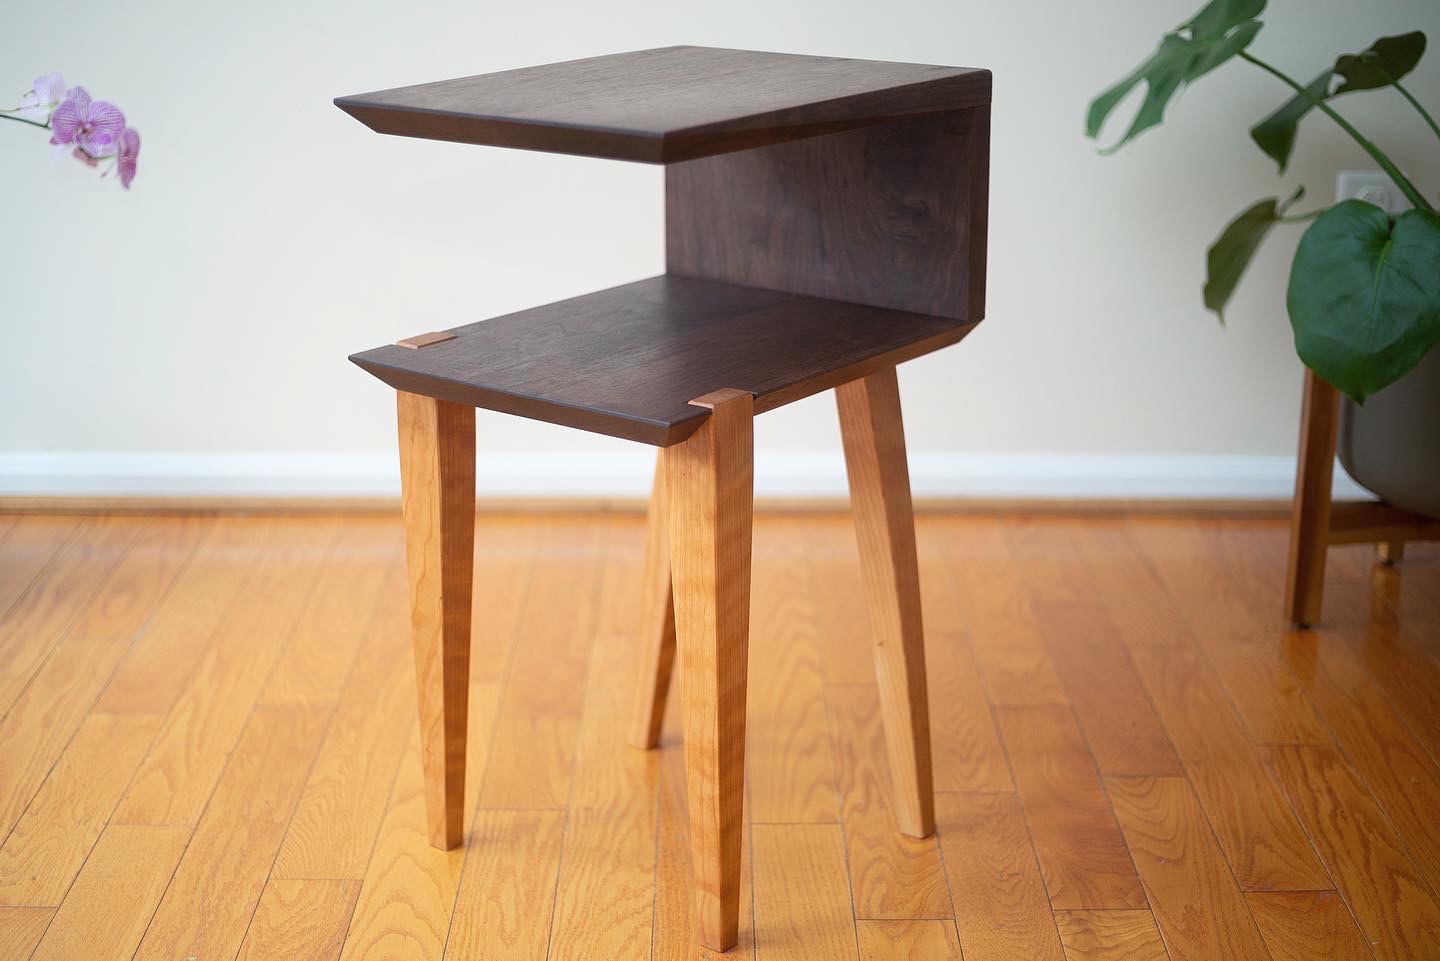
The Gonía Side Table
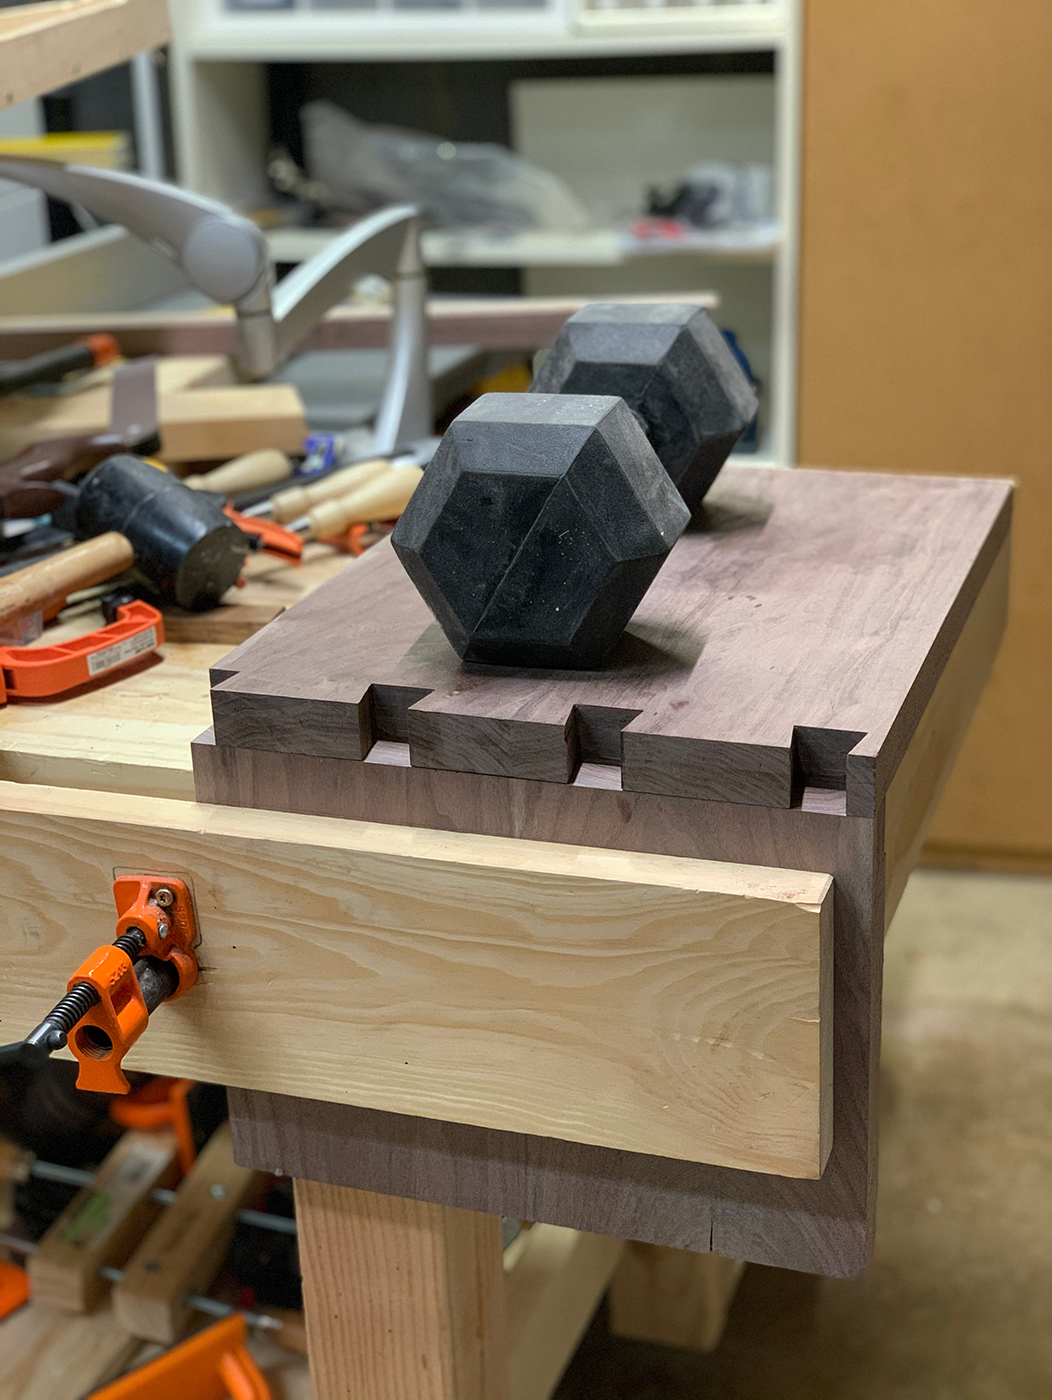
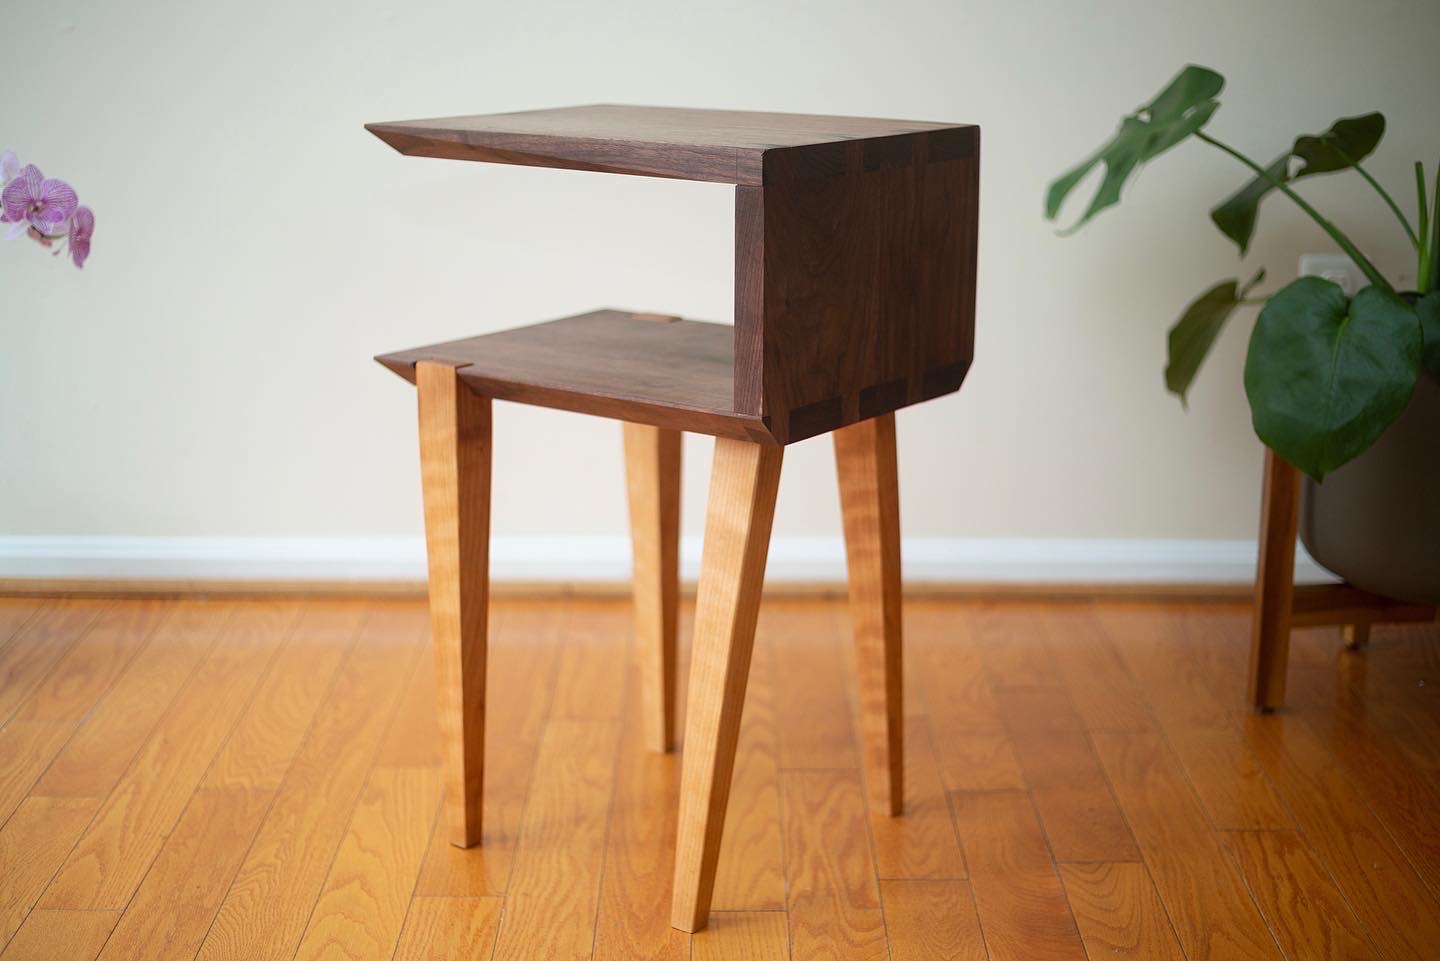
I finished a midcentury modern style side table last weekend and even gave it a name! Meet The Gonía Side Table – named to represent the essence of its design – its angles. I tried best to design and give a mid century modern feel to this piece with a bit of character and yet keep it simple overall and functional. This piece features dovetail joints, altering beveled sides, tapered and angled legs attached with mortise joints.
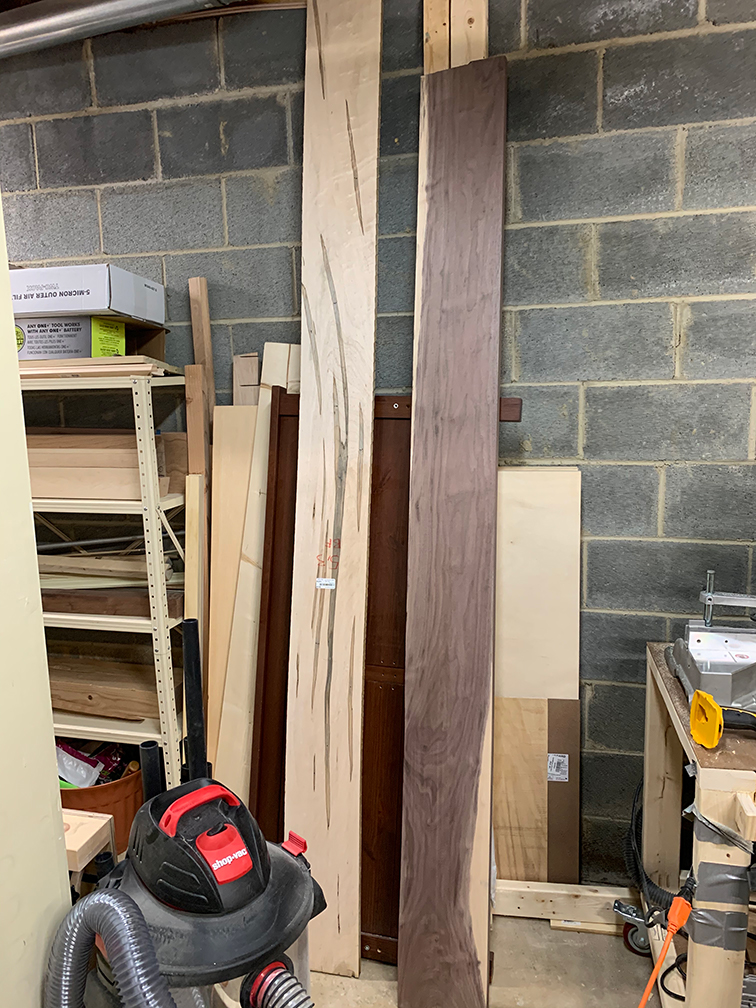
I started out with this project a few weeks back just before Virginia’s stay-at-home order went into effect. I had bought walnut and cherry wood from a local lumber store and had them mill the lumber for me in s3s (Surfaced 3 sides). I have a small wood shop in my basement and do not have a planer or a jointer, so being able to do this at the lumber store was super helpful for me. They also don’t charge me an arm and a leg to do so which is always a plus! After bringing these home, I laid out a rough plan with the available amount of wood I’d purchased. With the lumber cut to appropriate sizes, I knew I wanted to use dovetails joints so I got down to making the joints as the first step.
Just before I got started on the first step, however, I made sure to sharpen my tools razor sharp as I always do, so that I’m not slowed down in the middle of the process or worse yet, damage the wood. I have a set of diamond sharpening stones that I picked up after being sold on them by no other than Paul Sellers and I know I’m never going back to using whetstones again. These work really well and with the addition of leather strops with abrasive compounds, my chisels and planes come out razor sharp every time.
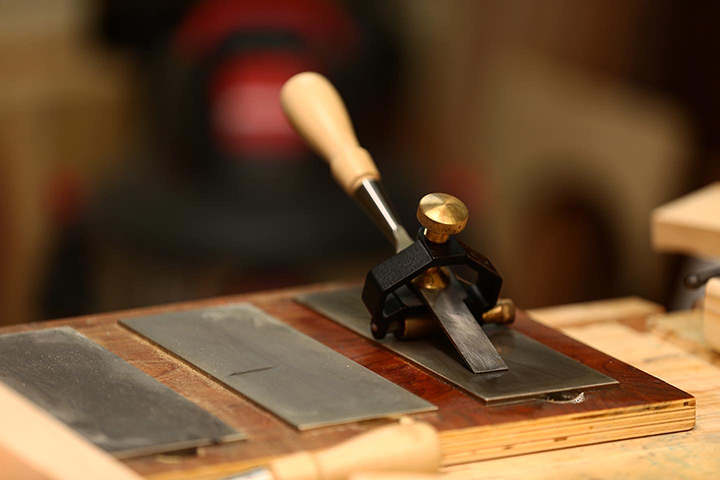
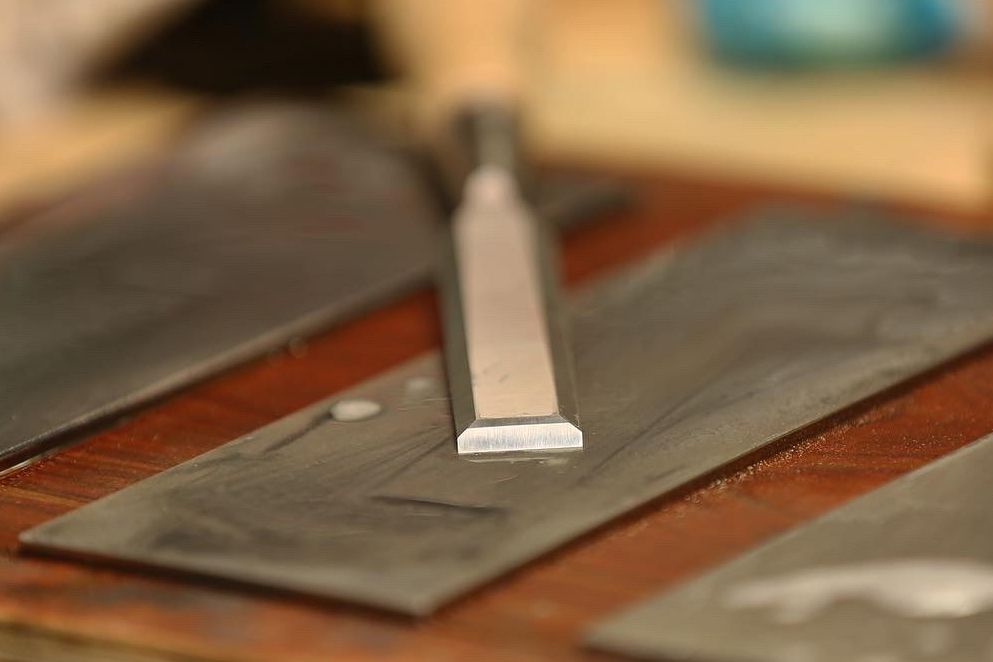
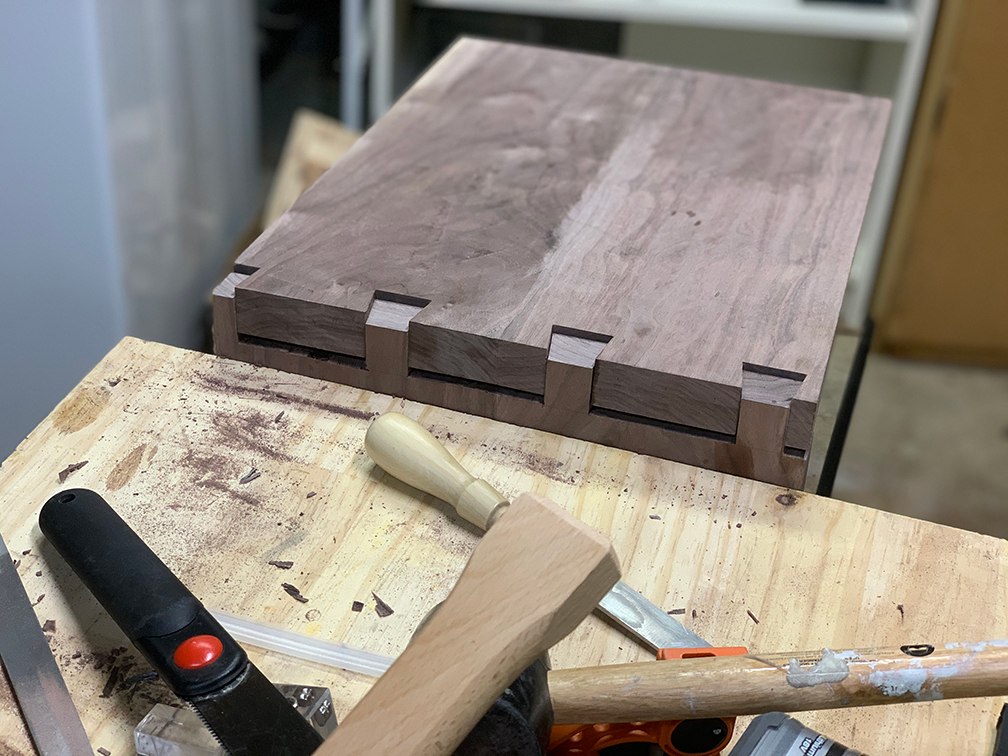
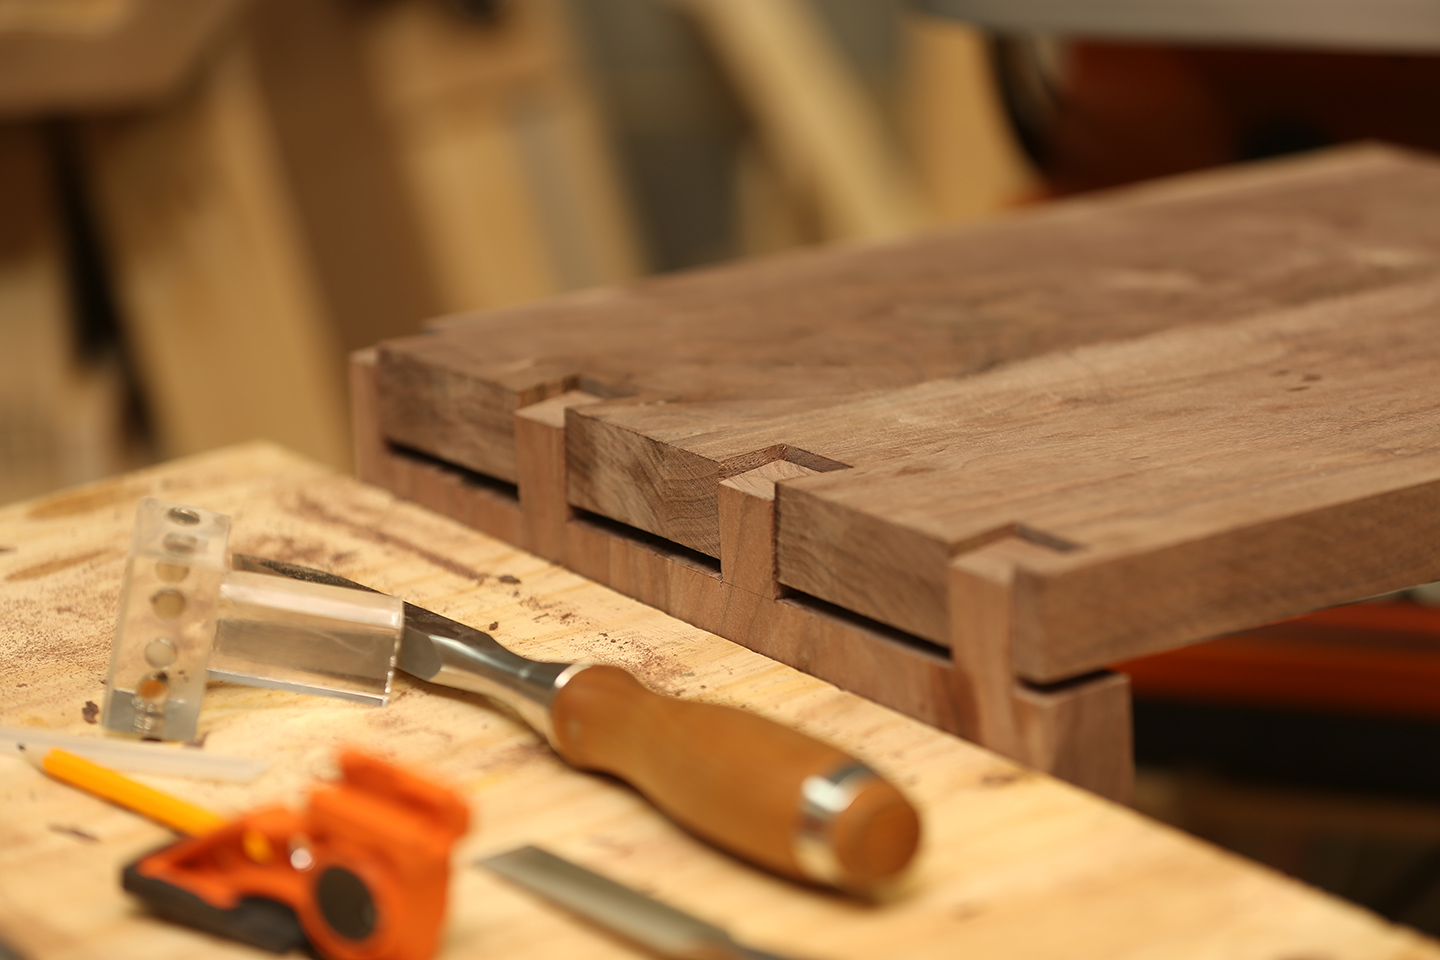
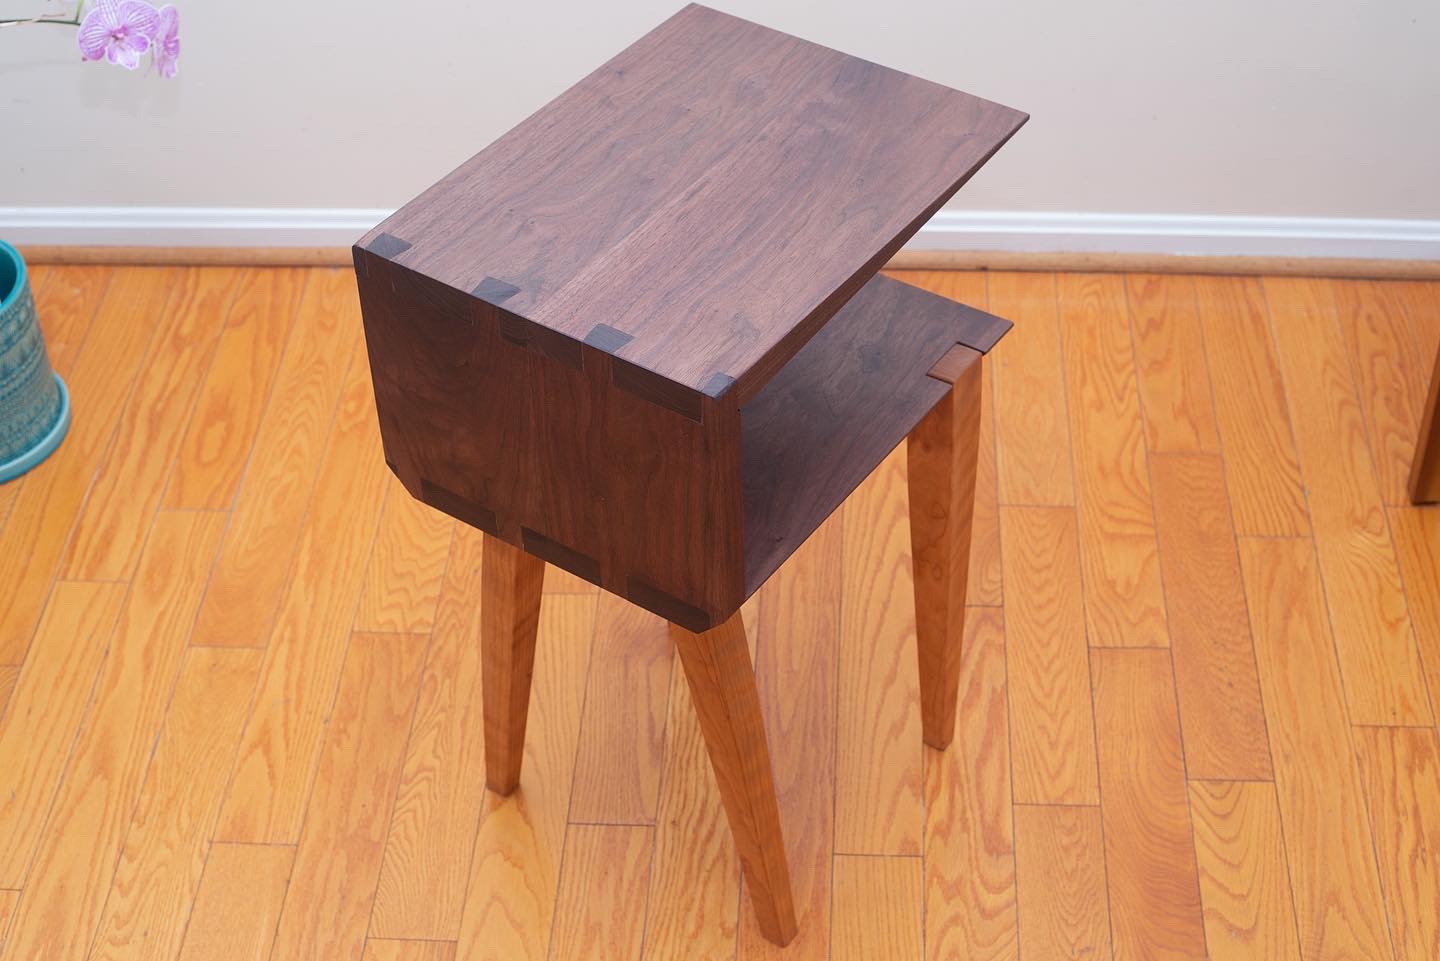
For cutting the dovetail joints, I pulled out my Katz-Moses Dovetail Jig, my marking knife, pencil, saw and my chisels. For this process I marked out the tail end of the boards with the thickness of the perpendicular board (the back of the side table) and clearly marked out the tails and the remaining portions of what was going to be waste material. I have both Japanese saws and European style saws and while I usually prefer the Japanese pull saws, I actually prefer the European style Veritas saw I have and find that best suited for the job with the dovetail jig. Once the cuts were done, I pulled out my chisels and carved away all the waste materials. By the end of the process, I had near perfect aligned dovetail joints that I was really happy with.
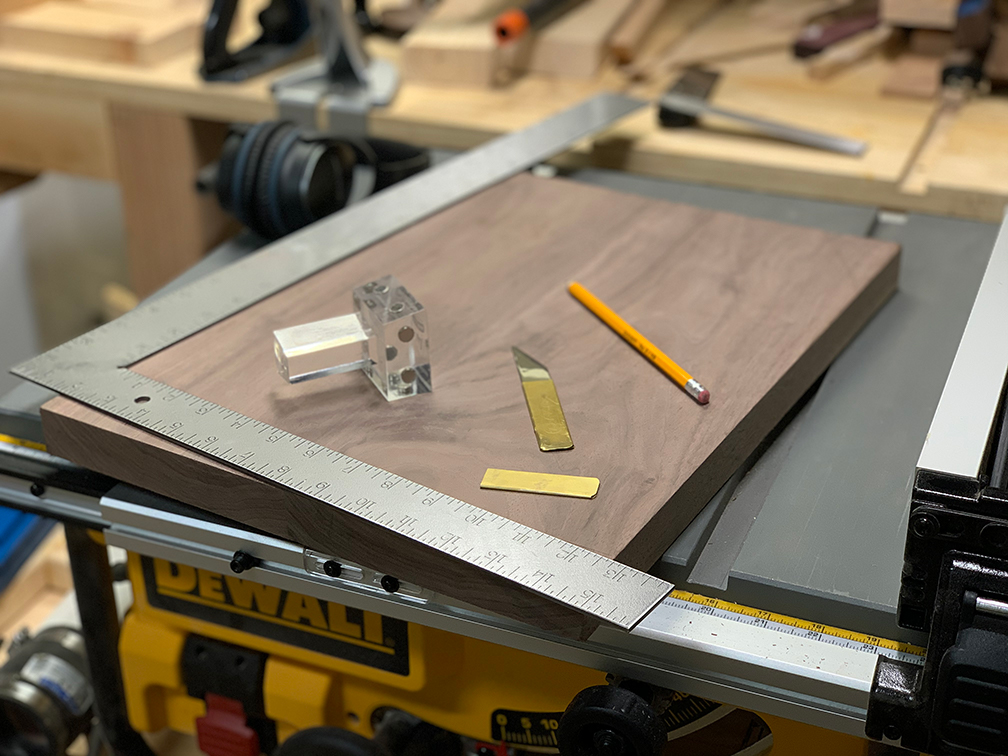
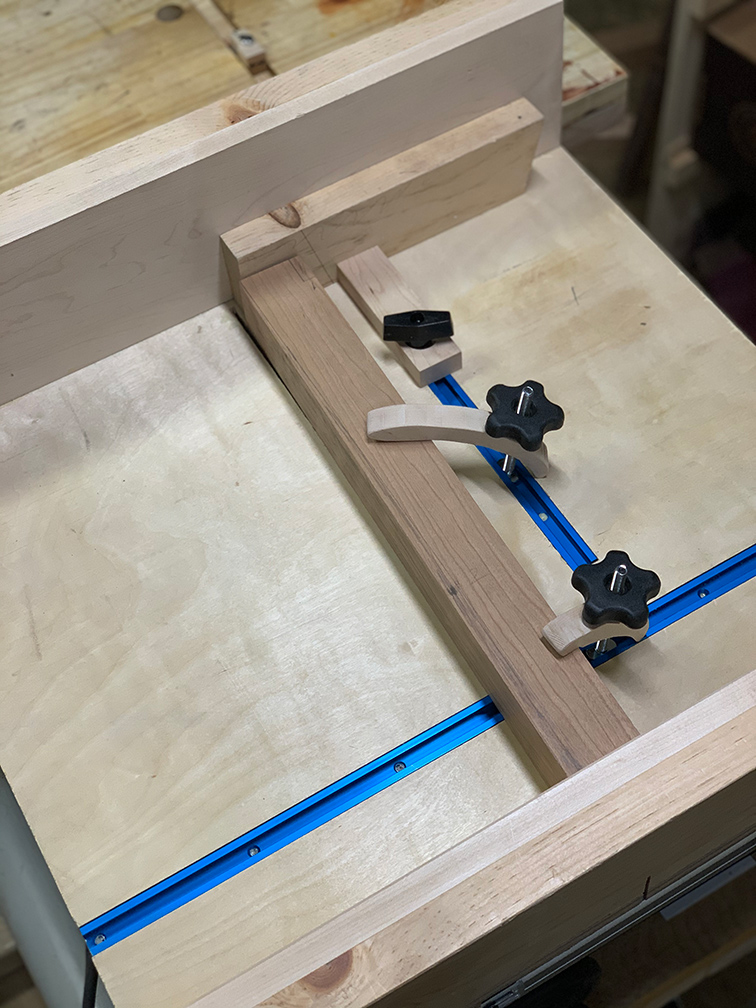
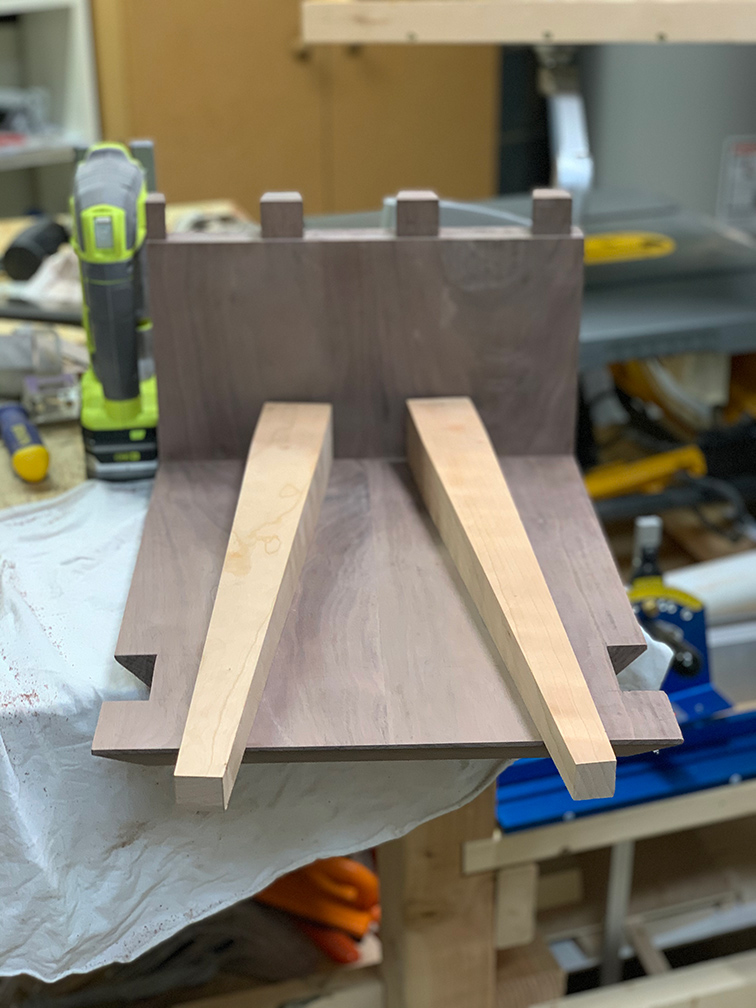
After doing the dovetail joints, it was time to take on the legs. I knew I wanted to set the back legs at an angle of 10 degrees while having all the legs tapered from top to bottom. To do this, I had to keep track of the angle at which I was tapering the legs and the angle of the slant of the rear legs. I created the tapered legs with a table saw crosscut sled that I’d made earlier that guarantees accurate cuts and provides supports for holding my work pieces in place while cutting.
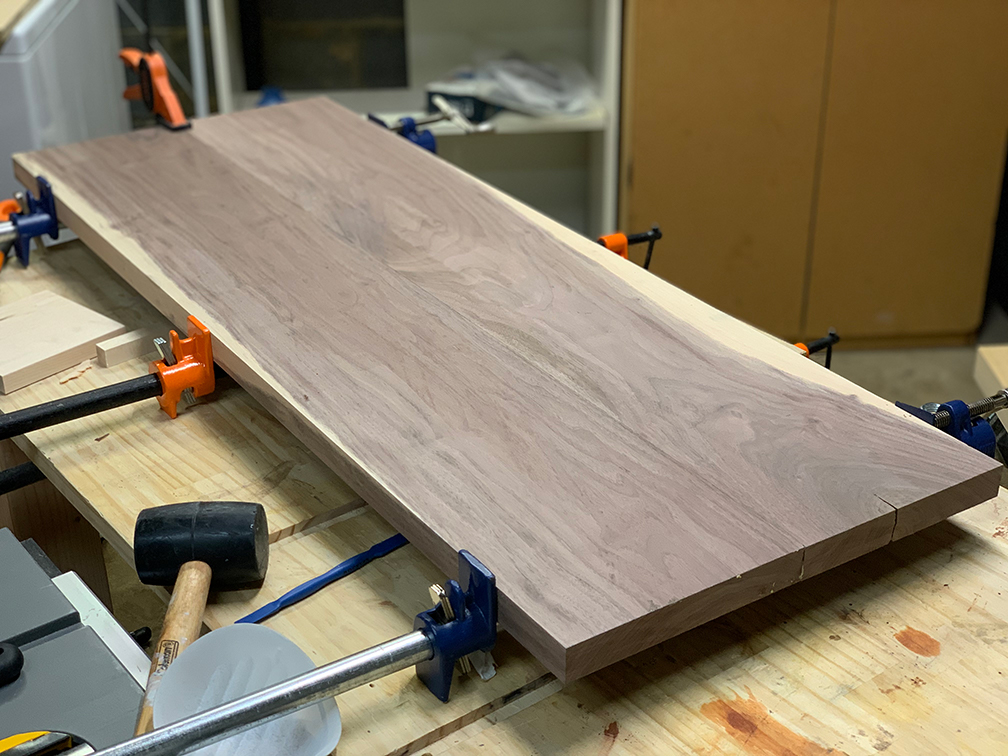
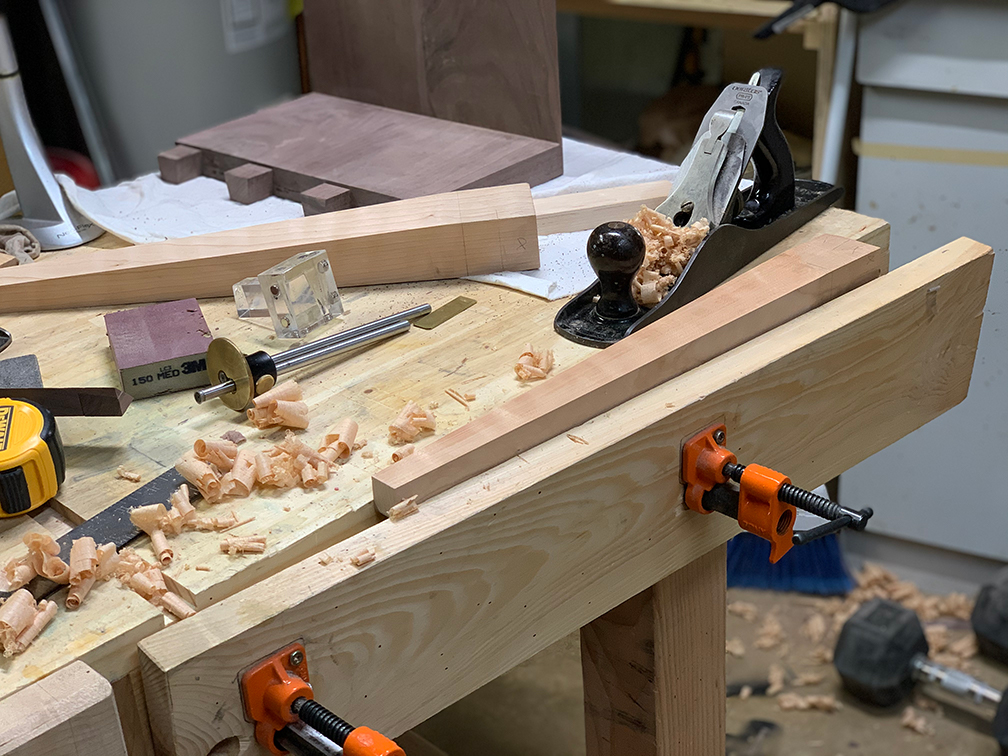
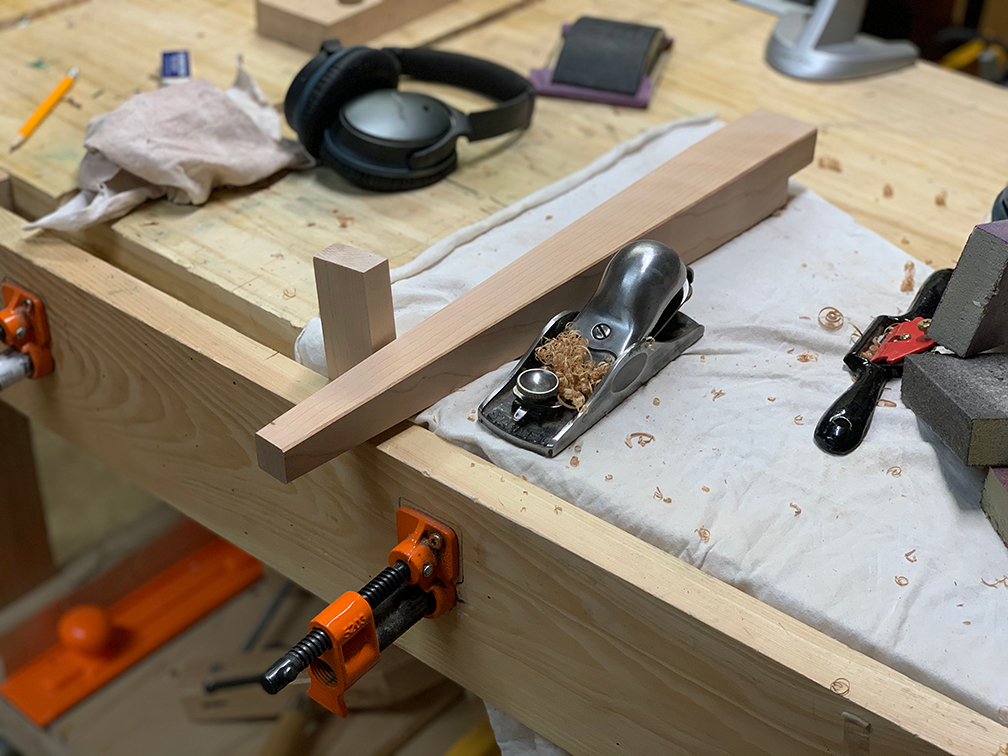
Once the legs were done, it was time to do the bevel cuts. I had to do this in the right order. First, I took the top part of the table and cut a ‘increasing’ bevel from back to front. Then I glued the back and the bottom of the top and cut bevels using table saw all the way through from back to front. This allowed me to make precise cuts. Once this was done, I cut mortises for the rear legs and cut in chambers for the front legs. I wanted the bottom portion of the walnut top to be supported on the cherry legs but at the same time have part of the front legs be visible, just so it adds bit of a character to the top. All leg slots had to be cut by hand, and this is where the sharp chisels shined! I also took a moment to blunt out all the edges of the leg with a block plane. This was particularly satisfying to do with the block plane made crisp sound while thin shavings curled up in the open chamber of the plane.
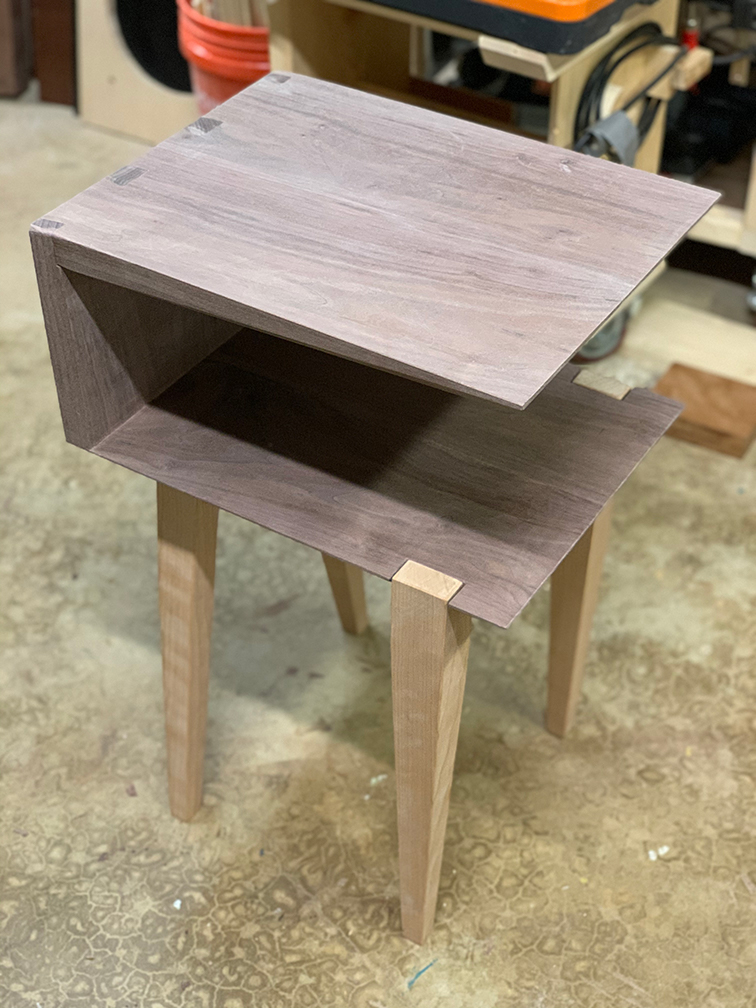
Once that was done, it was time to put it all together to the point of no return and glue everything up. I clamped everything down and let it dry for more than a day. The next step was sanding – a LOT of sanding and then some. I started with 60 grit sandpaper to smooth out all the uneven joints and then worked my way up to 800 grits by following through 120, 240 400 grit sandpapers and took out any sharp edges along the way. Once done, I wiped everything done and put on a coat of Boiled Linseed Oil on it and that immediately made the wood darker and all the grains very nicely exaggerated.
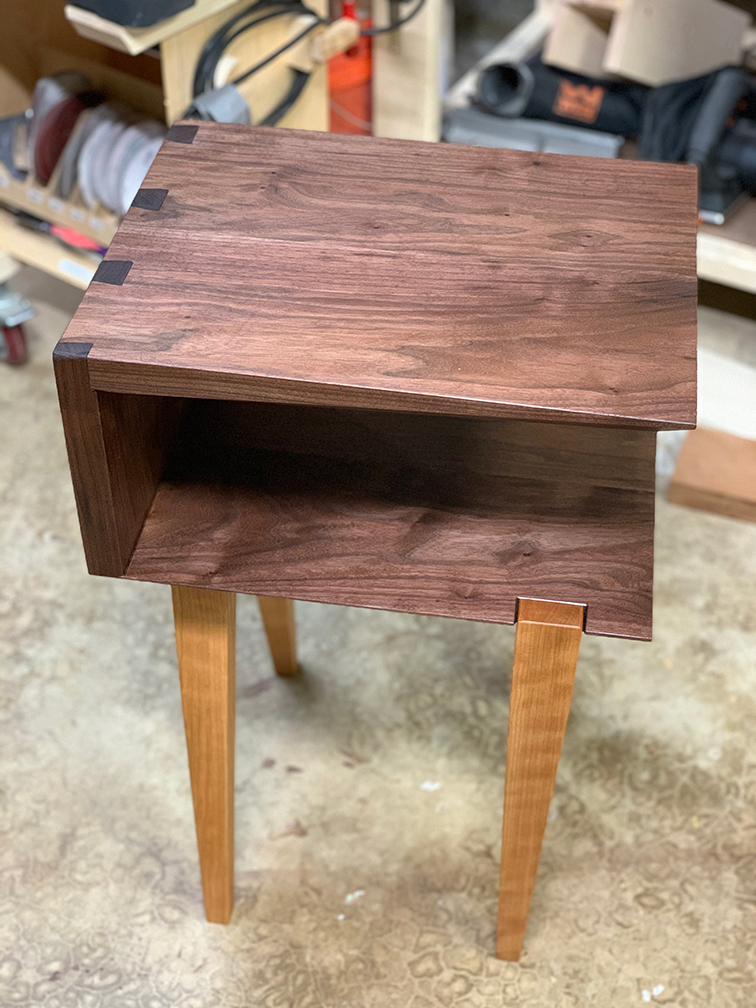
It was now time take some photos of this and here they are 🙂 A lot of love and care went into making this and hopefully furniture pieces like this will last a lifetime.

For more of my woodwork, please follow @woodness_gracious 🙂