Build: Retro Gaming console in a wooden case
As most people already know about me, I love making things with wood. I am a software engineer by profession and I love tinkering with hardware and wood as a hobby. As fun as it is to do my day to day job and spend time on my hobbies, to me it’s a whole lot more appealing whenever I get to combine hobbies and profession. So a few weeks ago, I had picked up a Raspberry Pi 4 for a smart home hub I wanted to build. One thing led to another and I ended up installing RetroPie in that Pi instead. From that point on, it was open season for ideas to flow through my head and, lo and behold, I ended up ordering a set of arcade game controllers and boards on Amazon.
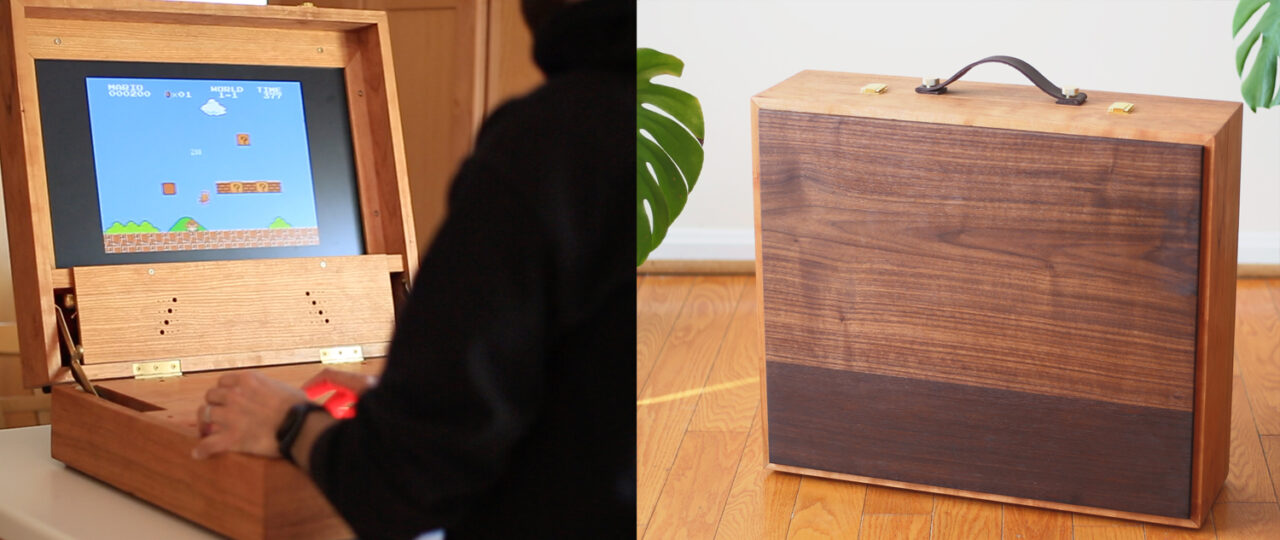
Approximately 4 weeks later, I have a cool wooden case where I can play almost any retro game I want.
The Plan
While this blog post is NOT a tutorial on how to build this console, I think there’s still value in mentioning how I approached this build so someone else can take ideas and may choose to build on that idea themselves.
After receiving the controllers and making a poor man’s version of a proof of concept, I took out my notebook and sketched up a design based on small box I had made late last year. The original design of that box was inspired by Matt Kenney who is quite well known in the woodworking community.
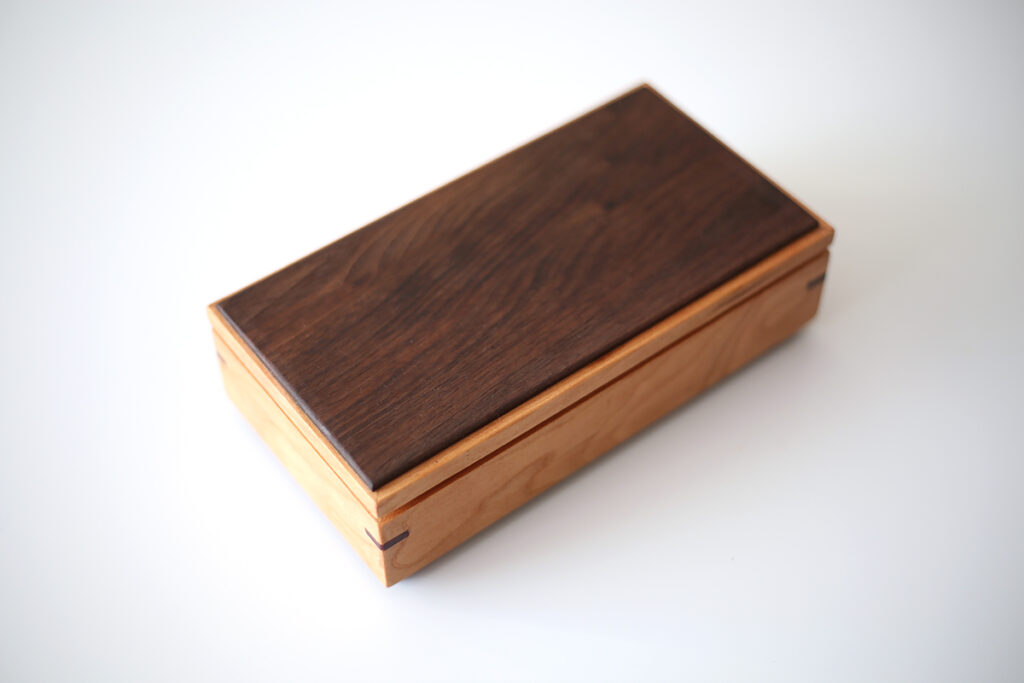
Box design inspired by Matt Kenney 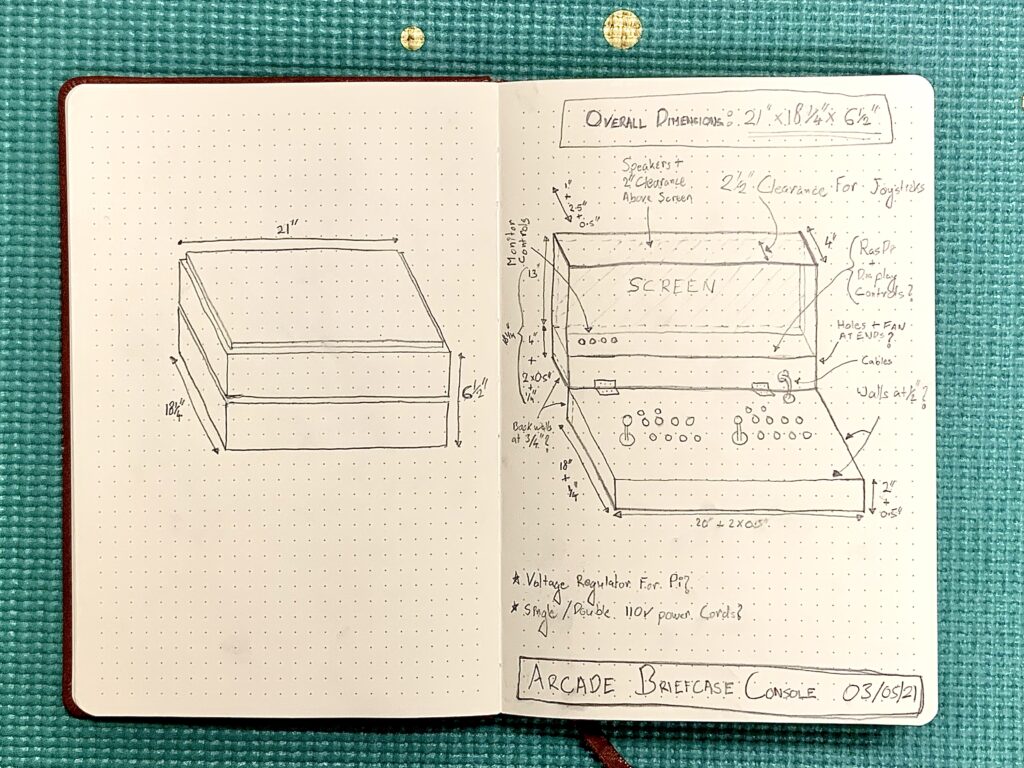
Original Plan Sketchup
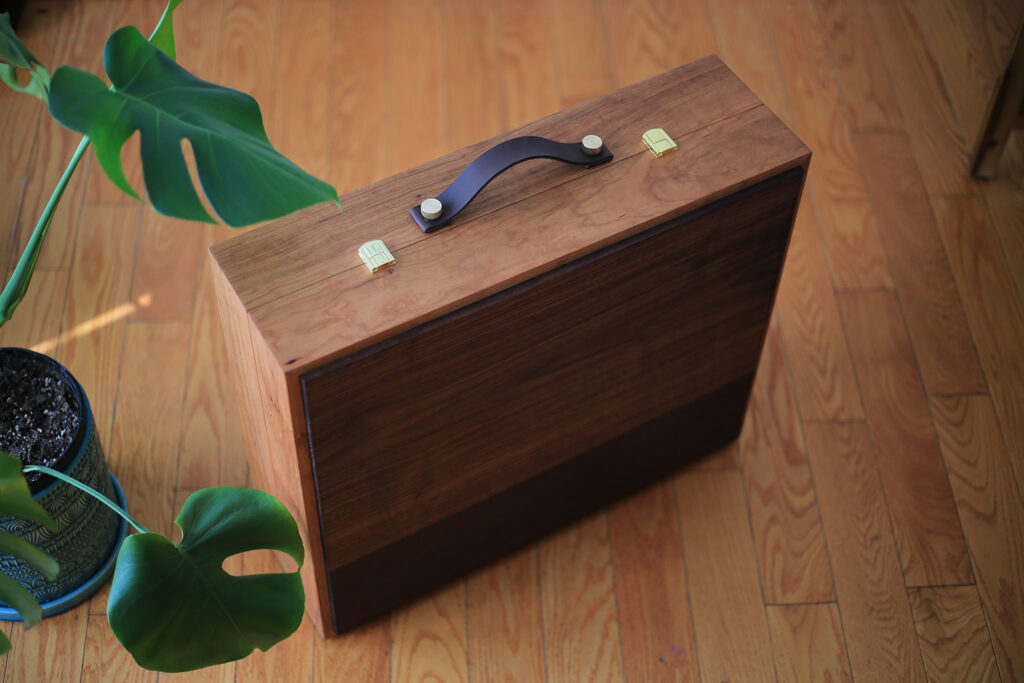
There are many types of wood I could choose from to do this, but in the end, I went with Cherry sides and Walnut top and bottom because I liked how it looked and these species of hardwood are slightly lighter than something like Maple or White Oak – either of which also would’ve looked great to be honest. I didn’t want the box to show any of the end grains, which ruled out finger joints or dovetails or even butt joints. I went with something that’s relatively straight forward – mitered four sides and cut grooves to allow for the bottom and top boards to fit snugly together.
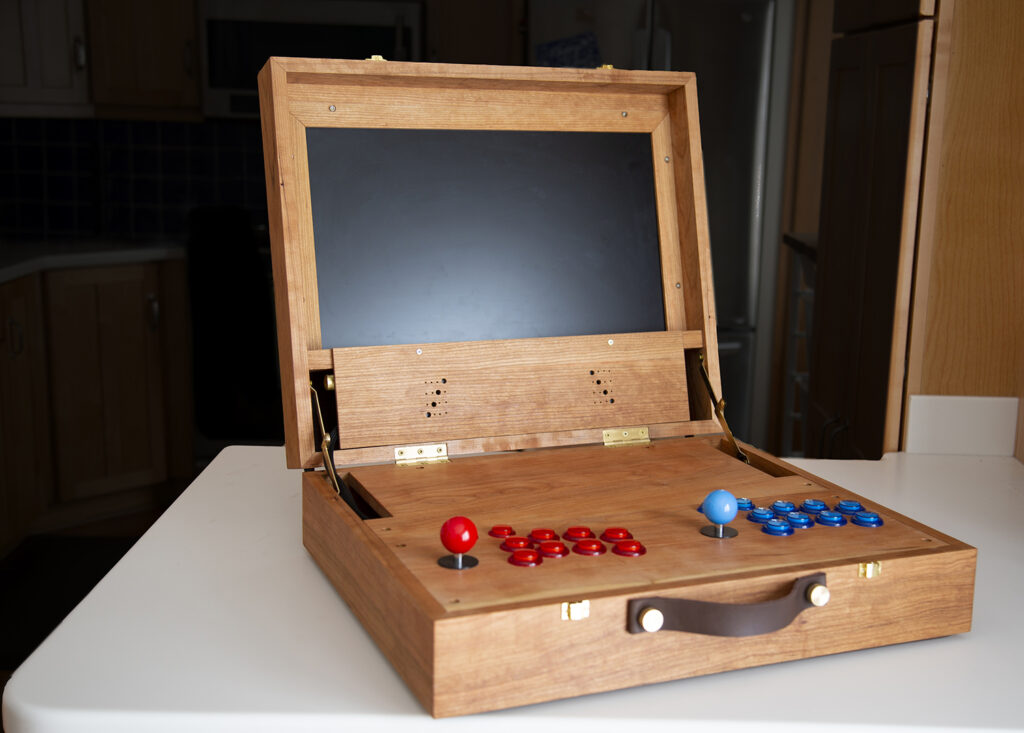
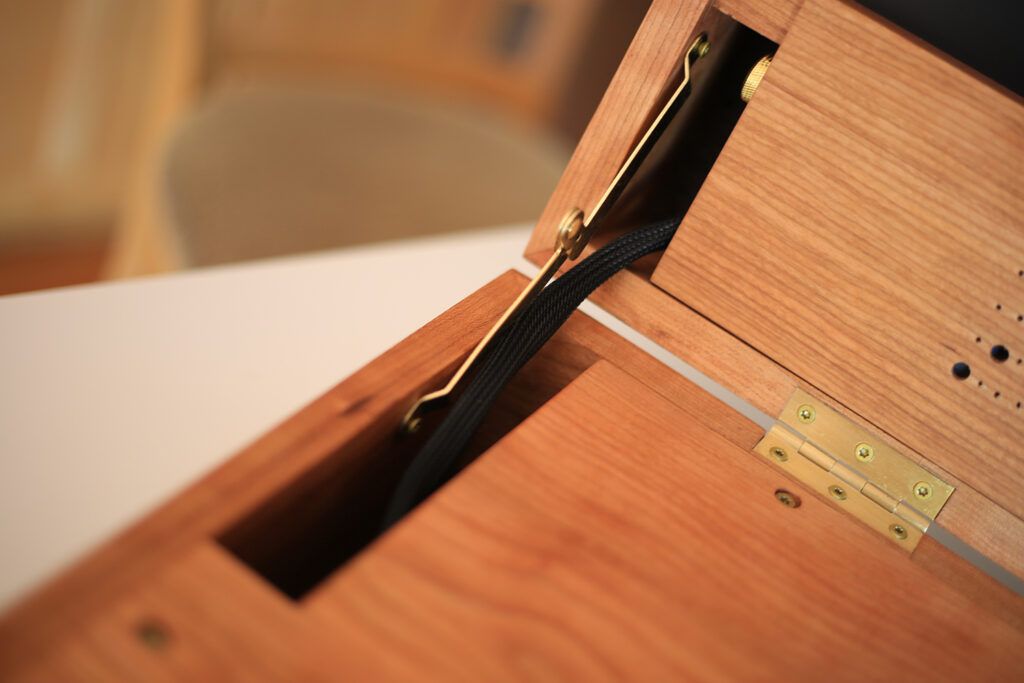
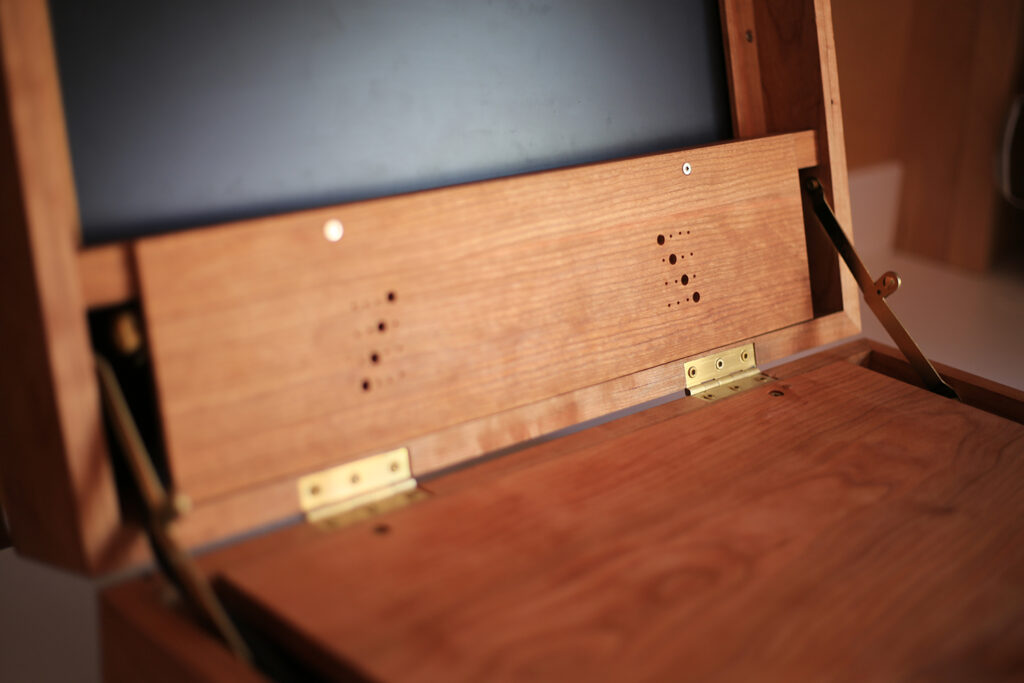
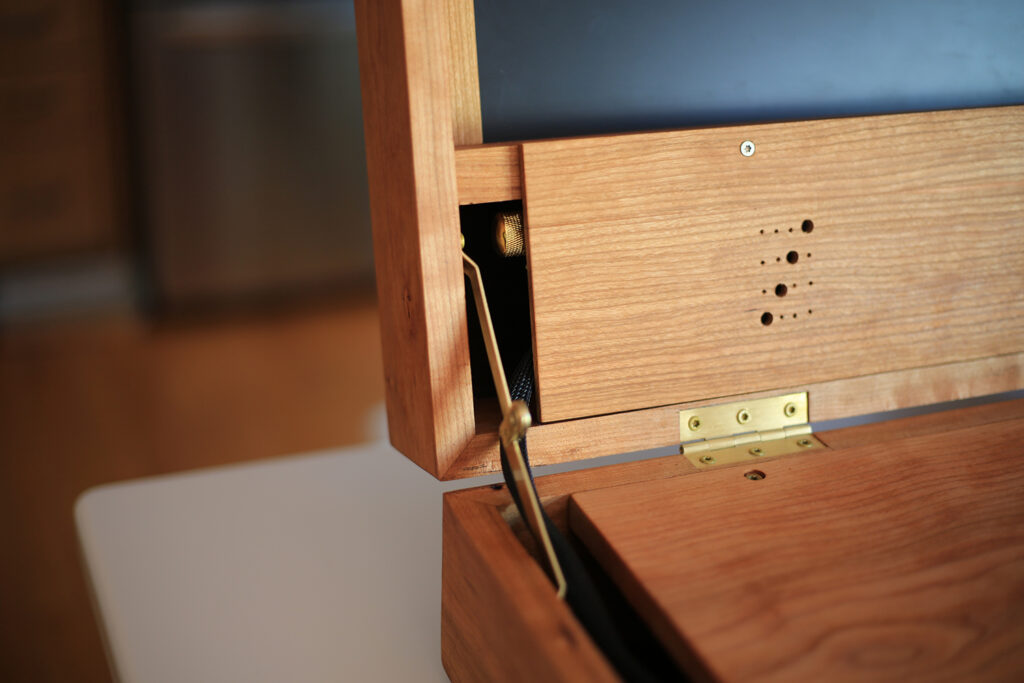
As far as where the circuitries go, I had to make a judgment call on whether to use the chamber at the bottom or the lid. In the end, given how I needed to have space for the joy stick handles, I decided to put the Raspberry Pi, LCD Panel Controller Board, Voltage regulator and the speakers on a special housing in the lid.
Internals
This gaming console is based on a Raspberry Pi 4B with 2GB RAM. I used a RetroPie image and followed instructions from here. For the LCD Panel, I used an old Lenovo monitor I had laying around in the house. Here’s the full list of items I used to make this. Most of these links are Amazon Affiliate links, so if you use these links to purchase any of the italicized items listed below, I will get a tiny percentage of that sale without any cost to you 🙂
- Cherry boards (dimensioned to about 1/2 inch thickness)
- Walnut Boards (dimensioned to about 1/2 inch thickness)
- Raspberry Pi 4B 2GB
- Arcade Console Controllers
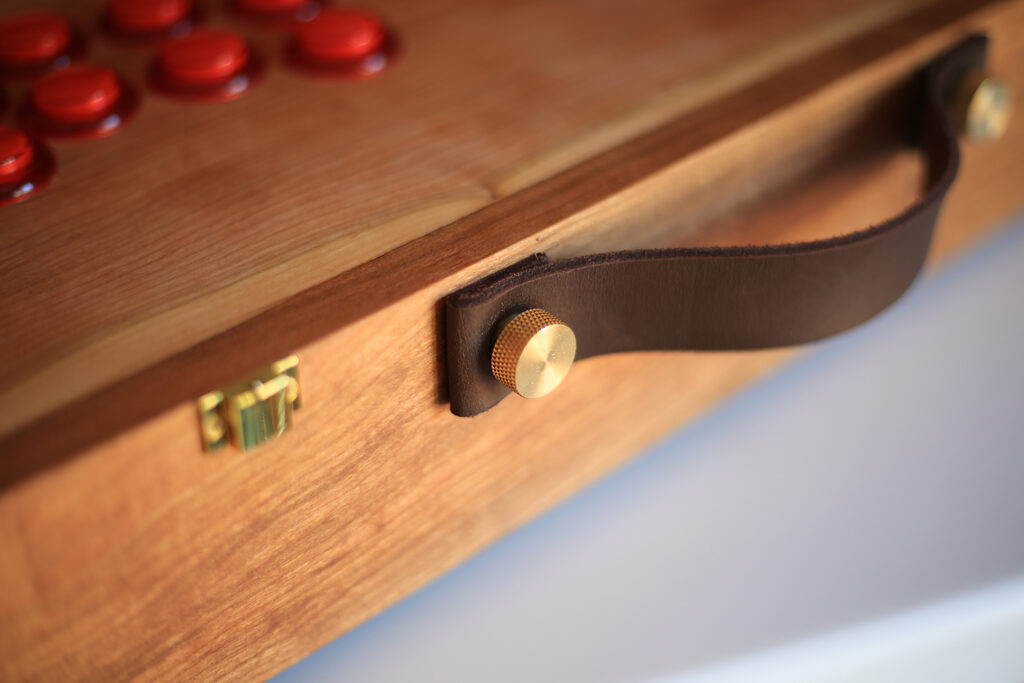
- Crazy Horse Leather
- Brass Knurled Thumb Screws
- Brass Hinges
- Brass Lid Stays
- DIY Speaker/Volume Kit
- 1/2″ PET Expandable Braided Cable Sleeving
- 32GB Micro SD Memory Card
- Buck Voltage Converter
- Heat Sinks for Raspberry Pi
- Small Rubber Round Feet
- Lenovo LI2264d Monitor
ROMS
For downloading ROMs of desire, I shamelessly followed detailed instructions provided here. Nothing much to add here besides a word of advice. The only MAME game I was able to successfully play was Cadillacs and Dragons. Most MAME games have interdependencies on each other, so unless you acquire the full set of MAME games, chances are, most of them will not work.